Looking for a silver lining? Quarantine life has definitely helped a lot of us get to those long-neglected projects around the house. Bored of bread and wrecked from weeding, I finally succumbed to my 14-year-old daughter’s perennial request to build her a home climbing wall.
At first glance, I almost went running back to that finicky sourdough starter. A quick Google search made me feel like I was wading into waters that were too deep for my nascent carpentry skills. But my daughter’s sad face—she’s a competitive climber who is really missing her 4-days-a-week climbing gym workouts—and my love of a good project made me persevere.
It’s not a simple task, but you can build a climbing wall at home and the joys definitely outlive a slice of bread. Here are a few tips I learned from my experience that might help to get you started.
Find the Right Spot
You may already have a place for your wall in mind, but there are a few things to consider before you start drilling. It’s best to find a “dynamic” space in your house. The prime area for a climbing wall may already have a natural incline so you won’t have to build overhangs and angles—think attics or garages.
Besides being out of the way, these spaces are often left “raw” meaning the 2×4 framing of the walls may still be exposed. If you opt for this type of unfinished space, you can easily drill into the studs and not build a new frame to go on top of a sheetrock wall. This was the breakthrough for my own climbing wall.
After days of stressing about building a reinforced structure from scratch (the only other option if you’re set on building on a regular sheetrock or drywall), I realized I can take advantage of the exposed studs in our garage and use that as a frame to attach my wall directly. It definitely reduced the level of difficulty by at least 50 percent. I also threw the idea of an incline out the window. Calculating angles and making joints felt like a bridge too far. But that should not deter you from creating the dramatically angled wall of your dreams. (And if you do make something that elaborate, you’ll be a much bigger star in my daughter’s eyes than I am.)
Gather Your Materials
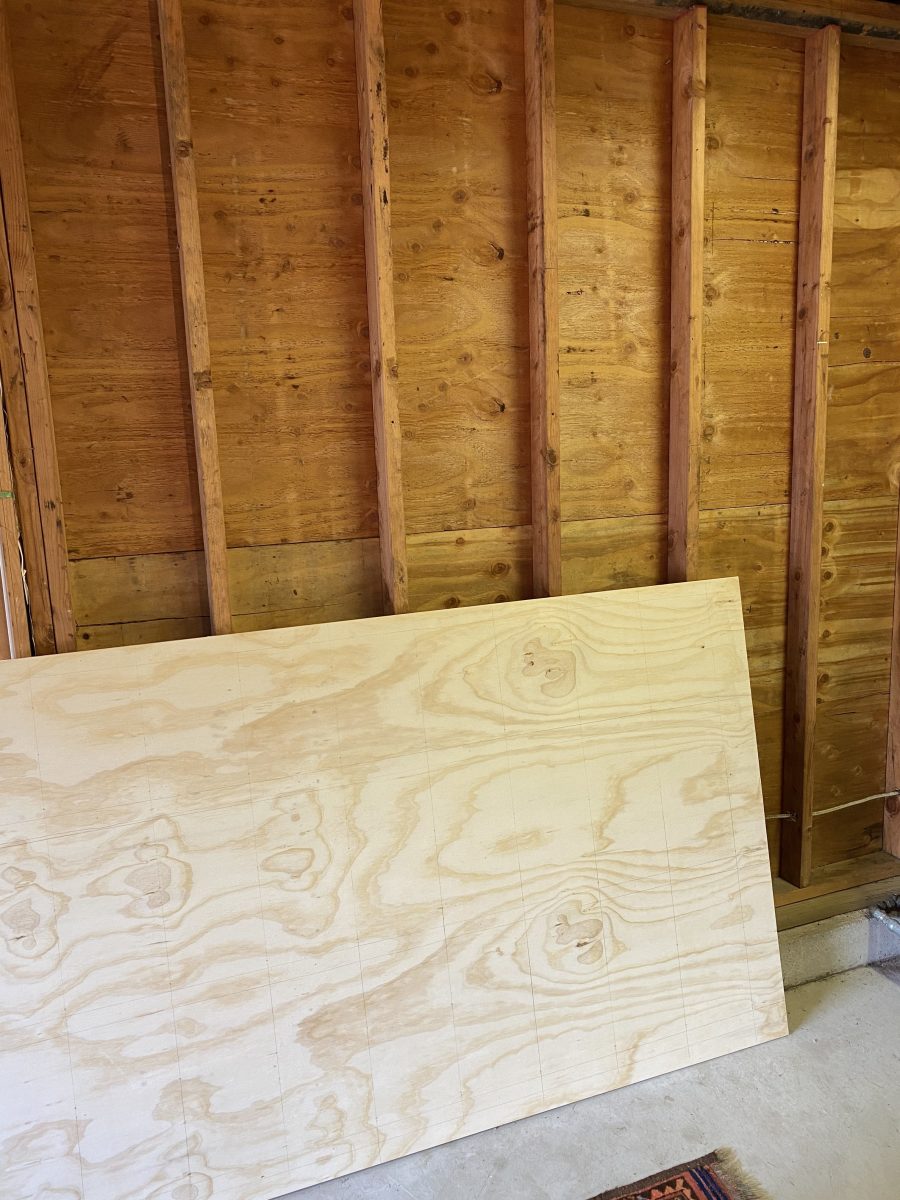
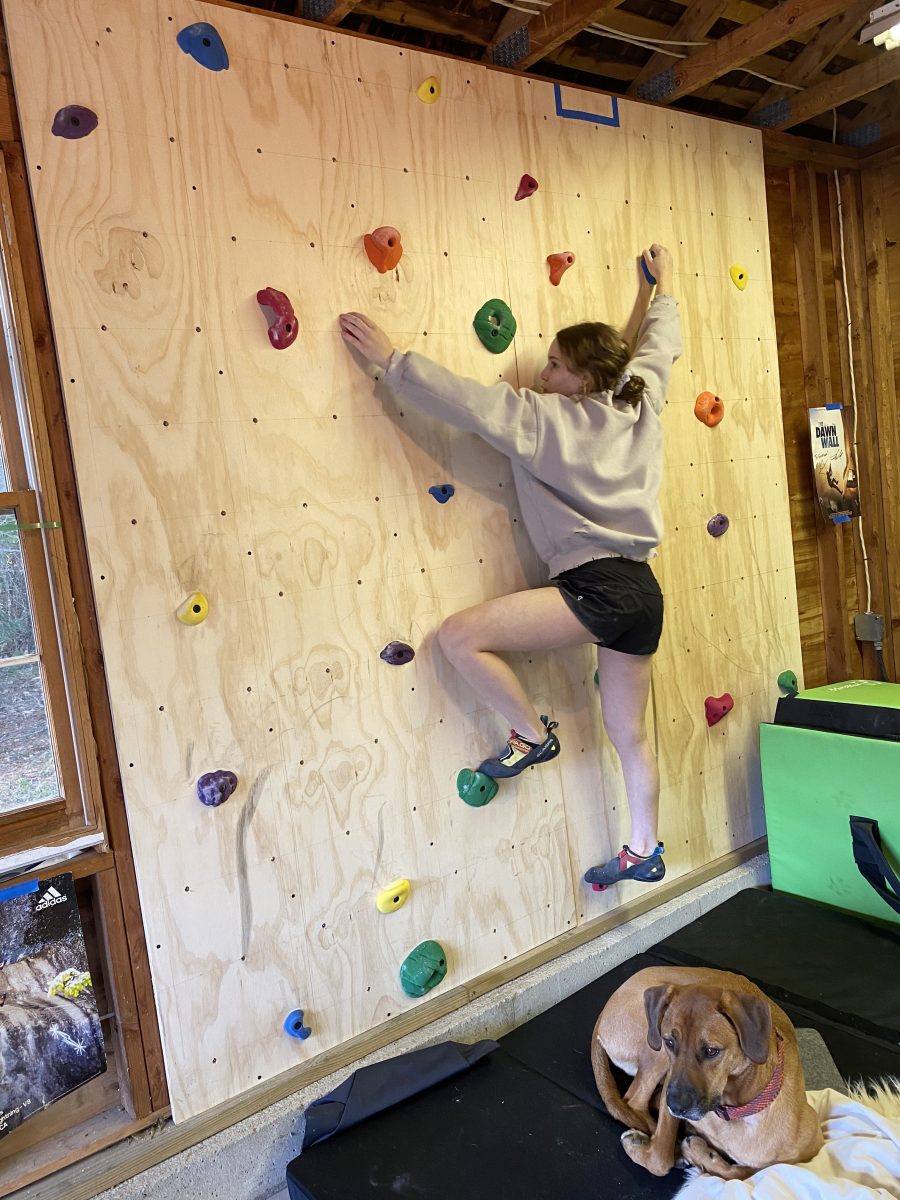
So what do you need to get started? Not too much. If you’re putting a flat wall on existing studs like me, all you need are a couple of plywood sheets (each 4×8 feet), deck screws, a 7/16 drill bit, and lots of T-nuts. That covers construction materials, but don’t forget about the climbing holds.
You’d be surprised (as I was) at how many holds you need to cover an 8×8-foot wall with enough hand and foot combinations to keep things interesting. We found Metolius, the Bend, OR based climbing gear retailer, to be a great supplier during quarantine.
Brooke Sandahl, the company’s VP, confirmed to Men’s Journal that her company was luckily well-stocked with training products going into this unprecedented period. “The resulting strong online sales really helped our business through this tough time,” she says. “We were very pleased to be able to help the climbing community stay psyched and fit and feel blessed to receive their support in return.”
Not only do they have a huge selection of holds, but they also sell large starter packs to get you going as well as wall accessories like the T-nuts and bolts. And don’t forget a crash pad (or three). Metolius’ giant 4×6-foot Magnum Crash Pad is great to set at the foot of your wall and portable enough to take to the crag as well.
Take Your Time
While we were excited to slap the boards on the wall and get climbing, it was immediately clear that a bit of planning would go a long way. Since every space is different I can’t tell you exactly what your measurements should be, but I will point out immediately where it paid to work carefully. While our plan to hang the boards directly on the garage wall studs seemed easy (and it really was), we needed to first mark the plywood boards to show where the studs behind our wall would lie. Because the climbing holds are attached to T-bolts they need clearance behind the board to screw in. In other words, our holes for the holds couldn’t be placed where there would be a stud interfering with the bolts.
By making lines to show the location of the studs we could then make a grid to show where we wanted our holes. We calculated that seven rows of alternating between eight and seven holes (to create a diamond pattern) would give us a nice uniform area to place holds and to move them around. We carefully marked the location of each hole and then drilled at the mark.
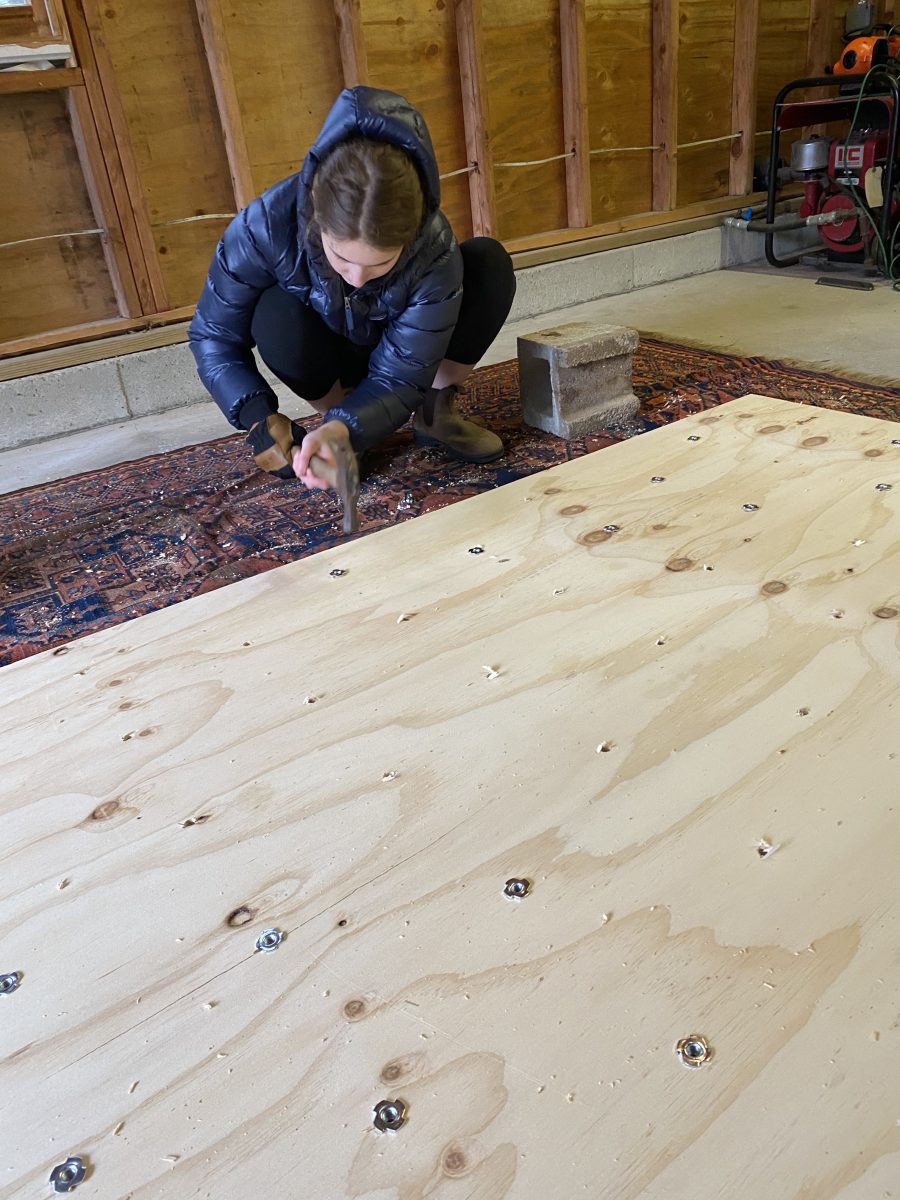
The next step was to hammer in the T-nuts. Although time consuming it was all pretty simple. (The only tip here is to get the nuts as straight and flush to the board as possible.) We repeated the same steps for our second board.
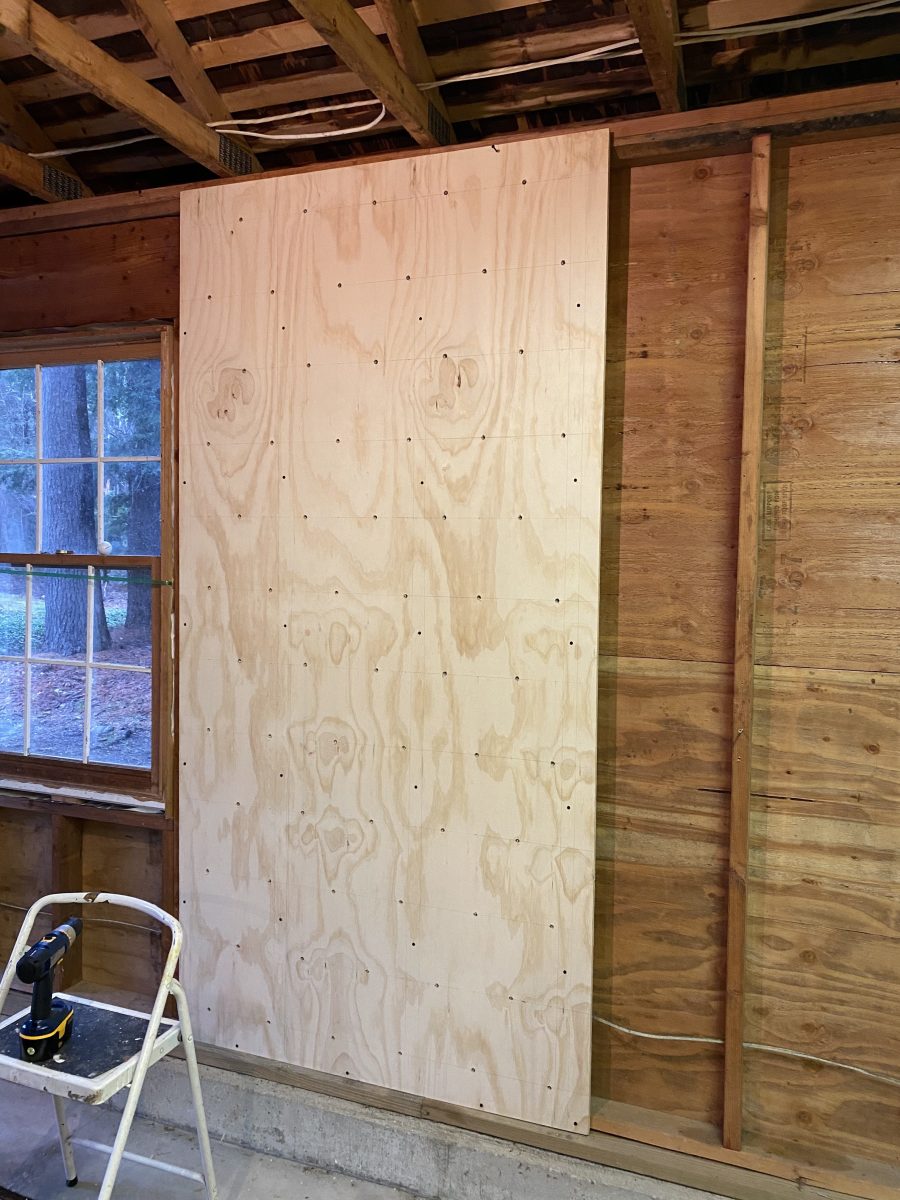
At this point we were ready to screw the boards to the wall. This is definitely a two-person operation, to get the boards in place and also screw them in using the long decking screws. After a bit of sweat labor we had two boards up with plenty of holes ready to affix climbing holds.
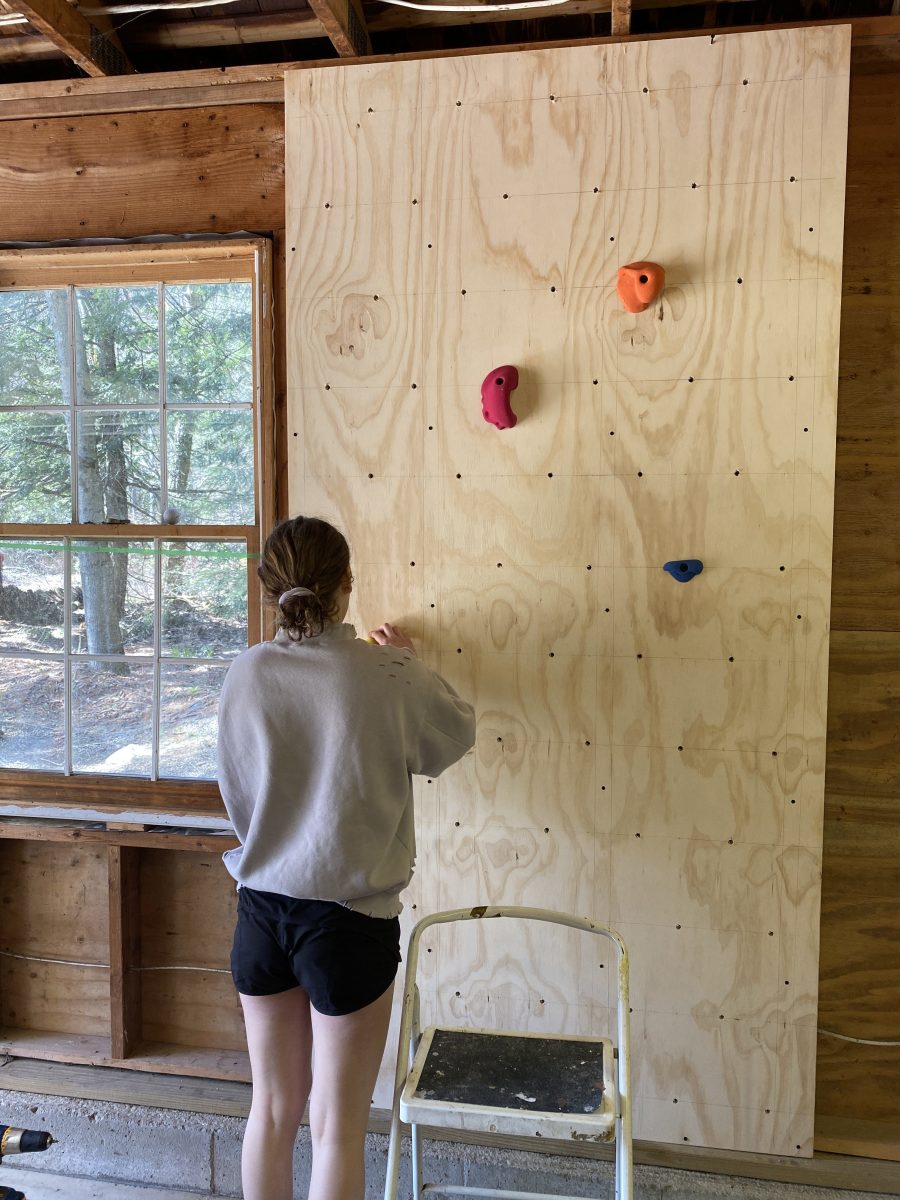
The holds easily attached to the T-bolts using standard allen wrenches, and in no time my kid was designing and crushing routes—while I was drinking beer.
from Men's Journal https://ift.tt/2TvZ9tq


0 comments